If this is your first venture to vSphere 6.7, you will notice that there is a HTML5 based web client in play. Things look a bit different than the previous client, but as of vSphere 6.7 U1, the HTML5 vSphere Client has complete feature parity with the previous client. Say goodbye to flash!
I wrote a detailed article on how to upgrade ESXi 6.5 to 6.7 here, and the steps are essentially the same. However, I remember back when I was first getting started with VMware, and sometimes I liked to see even the smallest updates outlined for me before I tried them myself, so let’s get to Upgrading ESXi!
Updating to ESXi 6.7 U1, The ESXi Upgrade Path
At this point, I hope you have already checked the VMware Compatibility Guide to make sure your environment is compatible with vSphere 6.7 U1. If you have not, here is a guide on how to use the VMware Compatibility Guide.
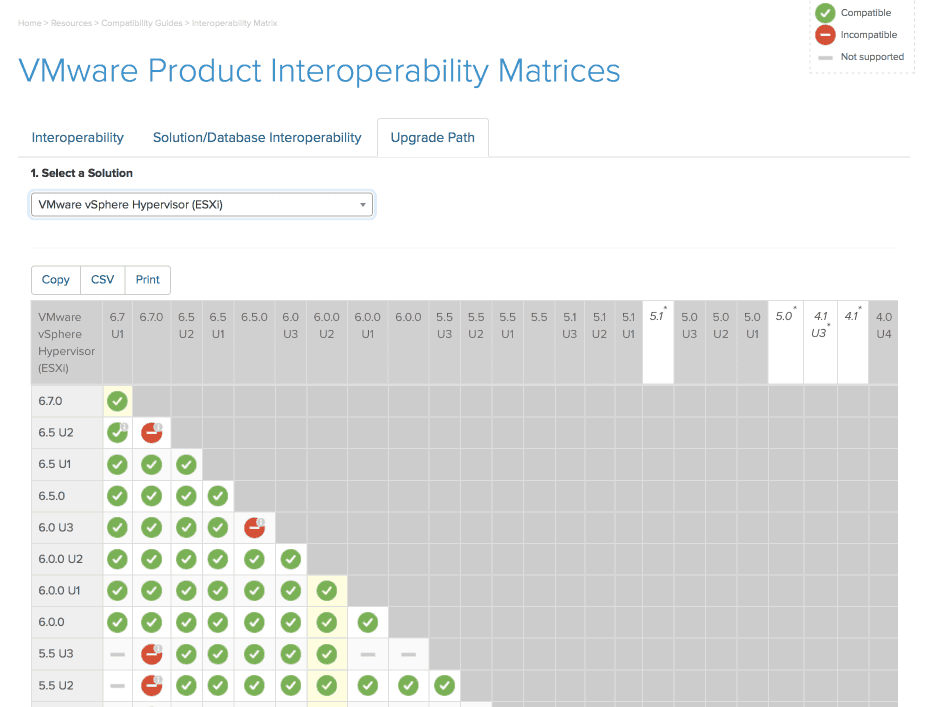
The next thing is to make sure you are on a valid ESXi upgrade path. To make sure of this, be sure to stop at the the VMware Product Interoperability matrices.
As you can see, as long as you are running vSphere 6.0 or higher, you can upgrade directly to ESXi 6.7 U1. This is great news for those running vSphere 6.5 U2, as they can finally take advantage of all the vSphere 6.7 features.
If you are running vSphere 5.5 still, you will first need to upgrade to vSphere 6.5, and then you can upgrade to vSphere 6.7. You can find a walk through of that process here. Ensuring the ESXi upgrade path you want to take supported is the first step in any upgrade, even beyond VMware.
Now that we have the basics out of the way, let’s begin our vSphere Upgrade to ESXi 6.7 U1.
The ESXi 6.7 U1 Upgrade Process Using vSphere Update Manager
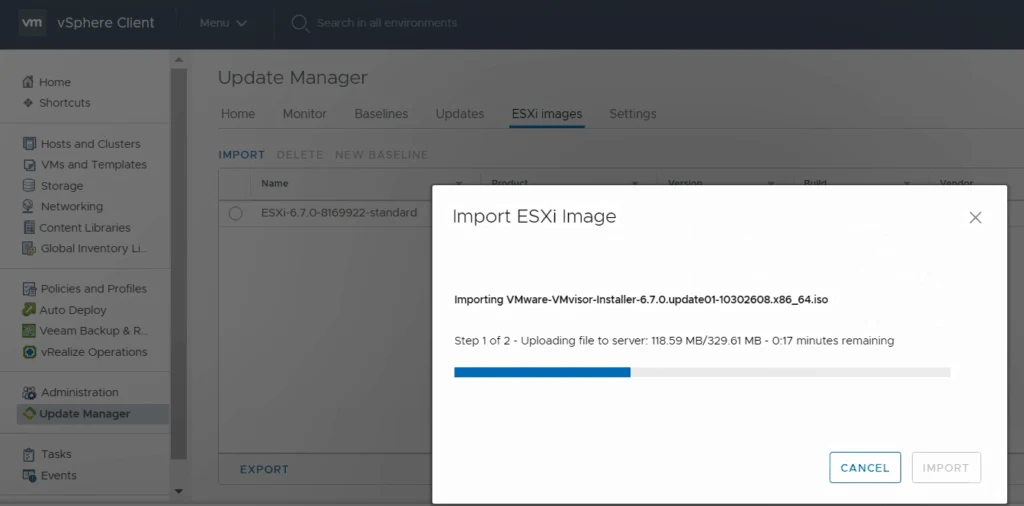
First, make sure you have downloaded the ESXi 6.7 U1 ISO. The next step is to upload it into Update Manager.
After you have selected Update Manager from the left navigation pane, or Clicked on Menu, then selected Update Manager from the drop down, simply select IMPORT, then browse to where you have downloaded your ESXi 6.7 U1 image.
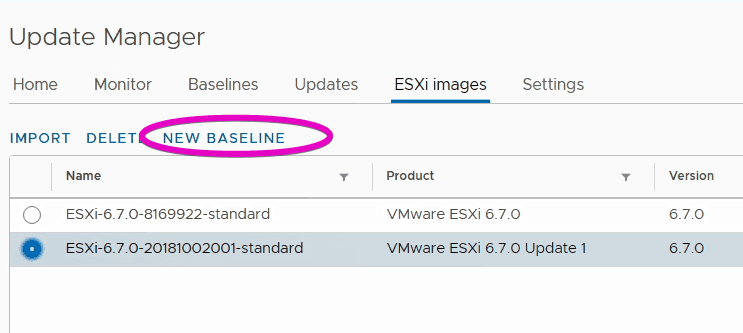
After your image has been uploaded, the next step is to create a new baseline. From the same screen, select the image you just uploaded, and then select NEW BASELINE
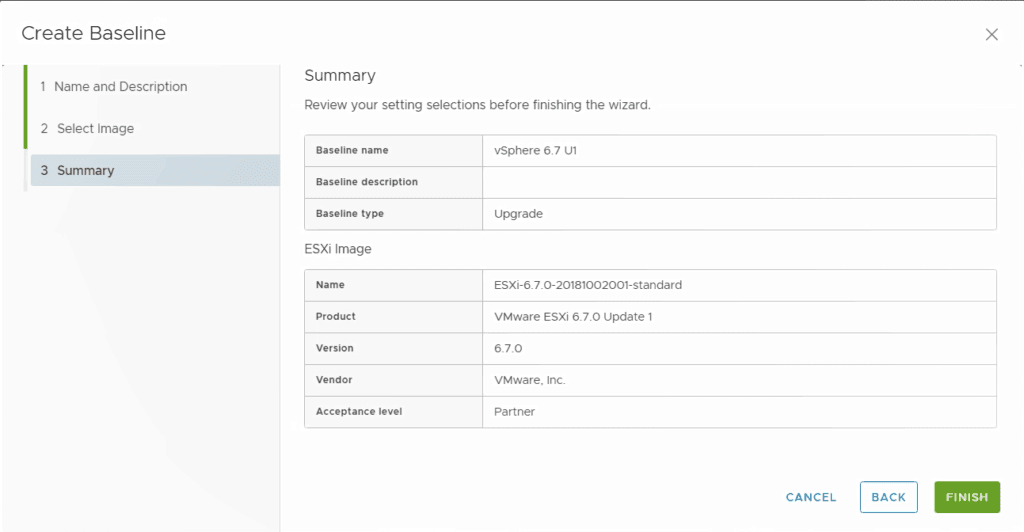
The great thing about VMware vSphere is most things are wizard based, like creating a new ESXi Upgrade baseline.
Here, you can see the steps I have taken to create the new baseline. I selected Upgrade Baseline in the first step in the wizard, then gave it a name that made sense – vSphere 6.7 U1.
Next, the image I selected was highlighted, since I selected it before creating the new baseline. If you did not preselect it, you will have the opportunity to select it in the next screen. Finally, we see our summary screen. Click Finish to create your baseline.
Attaching Your ESXi 6.7 U1 Upgrade Baseline
The next step is to attach your ESXi 6.7 U1 upgrade baseline. There are a number of ways to do this, but I like to do it at the ESXi cluster level.
As you can see in the image above, the baseline is not attached at this point. To get to this screen, I clicked on my ESXi cluster in the left navigation pane, then clicked Updates. Then, I clicked on Attach Baseline, selected my new baseline, then attach.
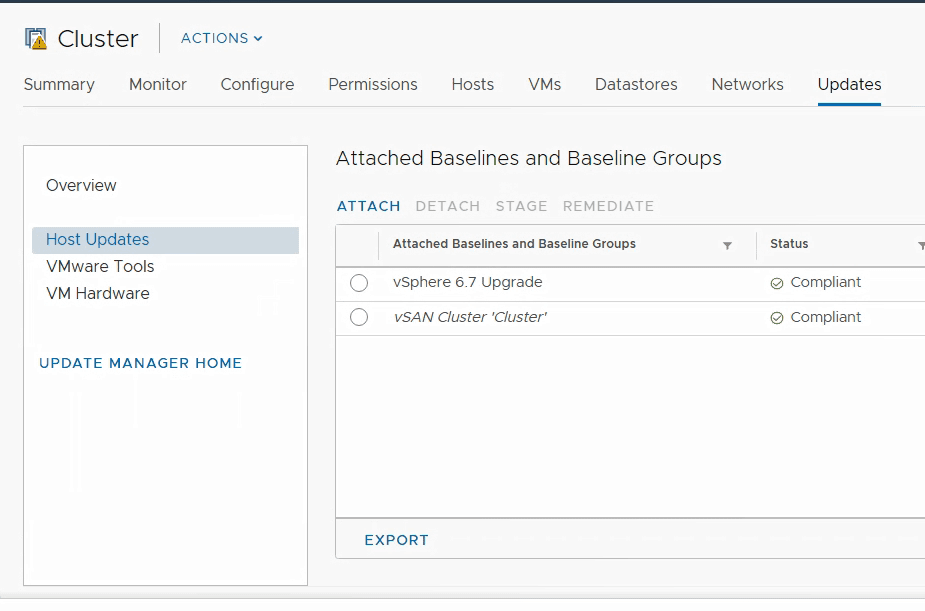
Now, after attaching my new baseline, I like to click on overview from the same menu in Cluster Updates. Here, I can check compliance.
As you can see, the ESXi hosts are not complaint with their new ESXi 6.7 U1 baseline. I could have also checked compliance from the summary screen of the cluster. There are many different ways to do the same thing in VMware vSphere!
Performing the ESXi 6.7 U1 Upgrade
Finally, we are almost ready for our ESXi 6.7 u1 upgrade! From our handy Updates screen on our vSphere Cluster, we will now go back to Host Updates and remediate the hosts.
Remediate is a fancy word for bringing them into compliance with our attached baseline, or Upgrading ESXi to 6.7 U1.
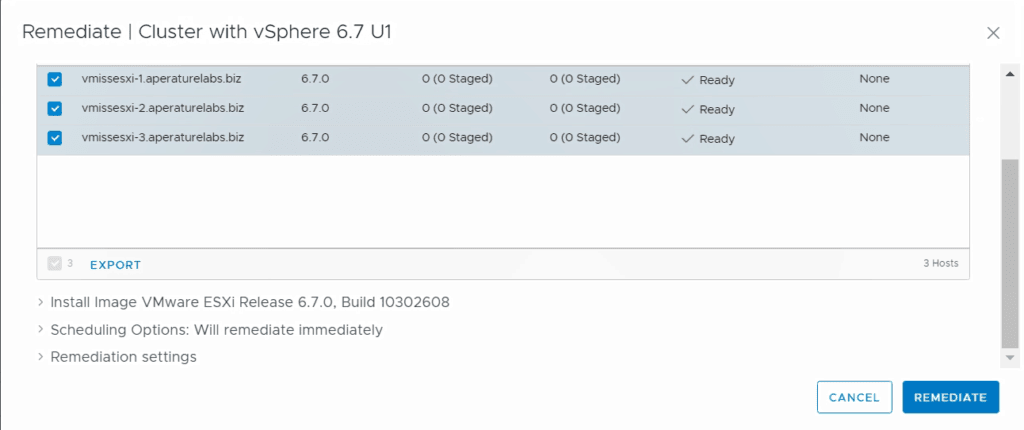
Now, we select our baseline and click remediate. Because we are operating at the vSphere cluster levels, you will see all the hosts in your cluster.
You can select them all, update manager will go through your cluster and and put your hosts into maintenance mode, upgrade them, and bring them out of maintenance mode one by one.
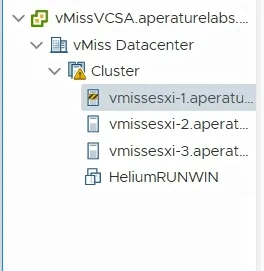
After you click remediate, you will have to accept the EULA. This is what my vSphere cluster looked like during the remediation process:
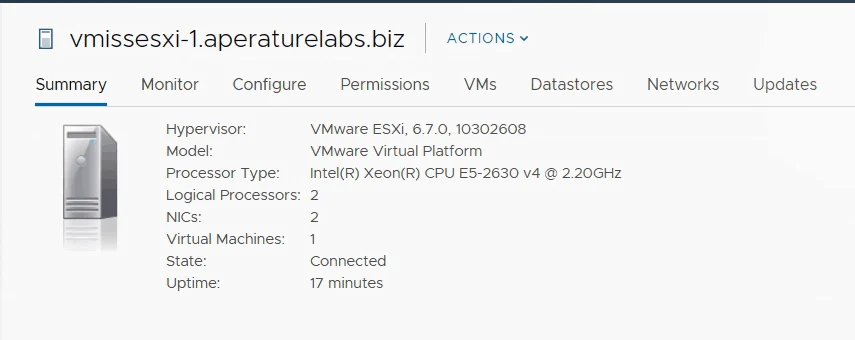
vSphere Update Manager updated each host in my cluster one by one! After my upgrade has been completed and all of my hosts are out of maintenance mode, I checked my ESXi hosts to ensure they were running ESXi 6.7 u1:
You can find the ESXi build numbers at this VMware KB article, and that build number corresponds to ESXi 6.7 u1. There you have it. You have upgraded to ESXi 6.7 U1. The next step in your vSphere 6.7 U1 upgrade journey is upgrading VMware tools and your VMware virtual hardware, as you can see in this guide.
This article is part of a series on upgrading to vSphere 6.7 U1.
Planning Your VMware vSphere Upgrade with VMware vSphere Update Manager
Everything You Need to Upgrade the VMware vCenter Server Appliance to vSphere 6.7 U1
Upgrade ESXi to 6.7 U1 Using VMware vSphere Update Manager
Updating VMware Tools and VM Hardware Compatibility with vSphere Update Manager 6.7 U1
Updating a VMware vSphere License in the vSphere Client 6.7 U1
Thanks to VMware vSphere Update Manager, your ESXi updates could not be any simpler. Be sure to pay special attention to the ESXi upgrade path for your version of vSphere to make your ESXi update even smoother.

Melissa is an Independent Technology Analyst & Content Creator, focused on IT infrastructure and information security. She is a VMware Certified Design Expert (VCDX-236) and has spent her career focused on the full IT infrastructure stack.

