This article provides an overview of how to use the UCS Platform Emulator. It describes initial configuration and use, as well as a few tips and tricks I have picked up along the way. You also may see this referred to as the Cisco UCS Emulator or UCSPE.
Why would you want to use the UCS Platform Emulator anyway? Great question. You may be an administrator looking to use the platform in an environment where you can break things and not worry about impacting production. Perhaps you are evaluating the UCS Platform and want to get a feel for day to day operations.
Whatever the use case, if you want to spin up a UCS environment and play with configuration, the UCS Platform Emulator is the tool to do it with.The UCS Platform Emulator provides the ability to configure virtual hardware which is then accessed via UCS Manager, which is the UCS platform’s management tool.
This article is broken up into a number of sections. Click the link to go directly to a section to learn more on the specific configuration step for the Cisco UCS Emulator.
Initial Setup of Emulator
Logging into the UCS Platform Emulator
Managing Virtual Equipment
Removing
Adding
Saving an Equipment Configuration
Launching UCS Manager
Saving the UCS Manager Configuration
Importing (Restoring) the UCS Manager Configuration
Troubleshooting
If you’re looking to upgrade your Cisco UCS Platform Emulator to a newer version, check out the detailed walkthrough I have put together.
Initial Setup of the Cisco UCS Platform Emulator
First, download everything you will need from the Cisco website by clicking HERE. Note, you will need to login to the Cisco site to download the Cisco UCS Emulator. You should download the OVA or Zip file, and the user guide. Hopefully the information in this post will help you skip reading most of the user guide.
Make sure to select the version of UCS Manager you are looking to emulate, as there are several currently available as well as archived. I’m going to be using UCS Manager 3.1(1ePE1).
You will also need to decide what your virtualization platform of choice is. You can use VMware Player, VMware Fusion, ESXi, or Hyper-V. The tool is deployed as an OVA. Deploy the OVA into your environment and start the virtual machine. This article assumes you know how to deploy an OVA. By default, the VM will use DHCP, but you can put in static IP addresses if you would like.
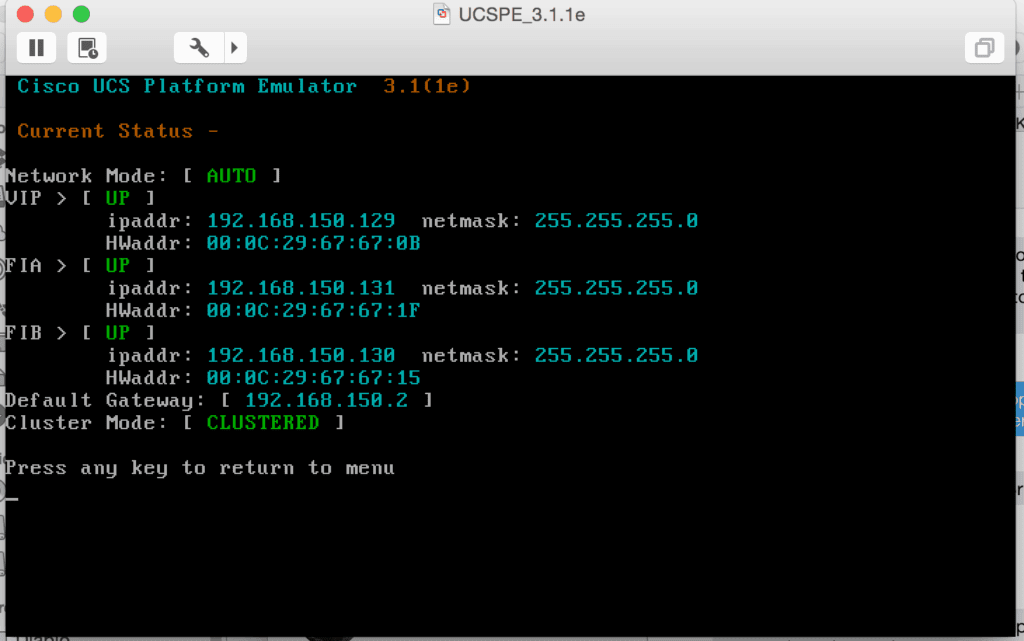
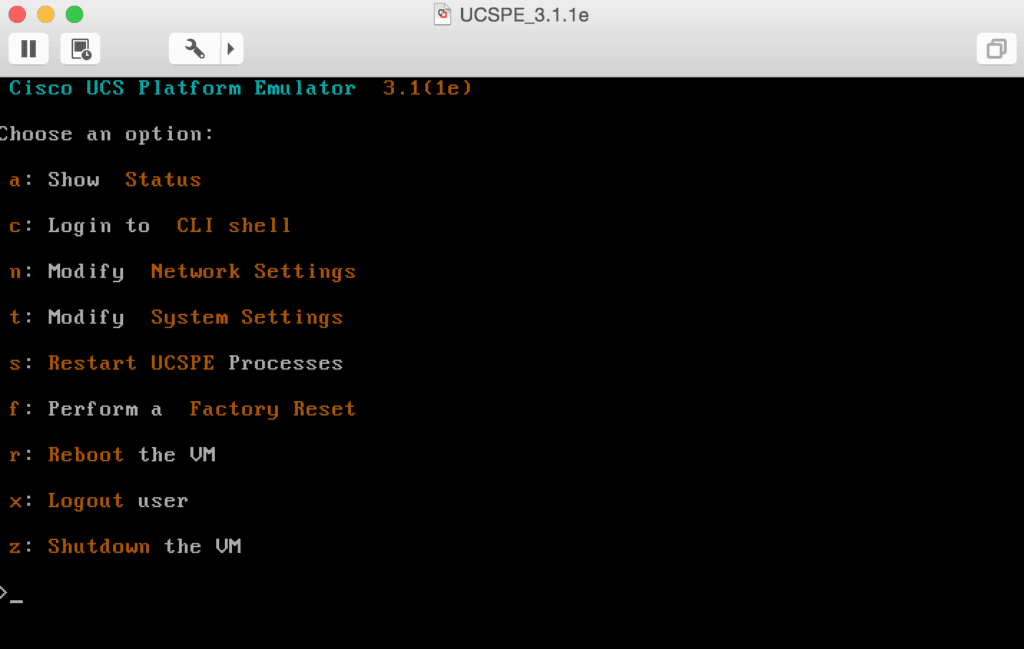
If you want to continue with DHCP, hit a to view your current IP address.
If you want to use a static address, hit n for modify network settings.
Logging into the Cisco UCS Platform Emulator
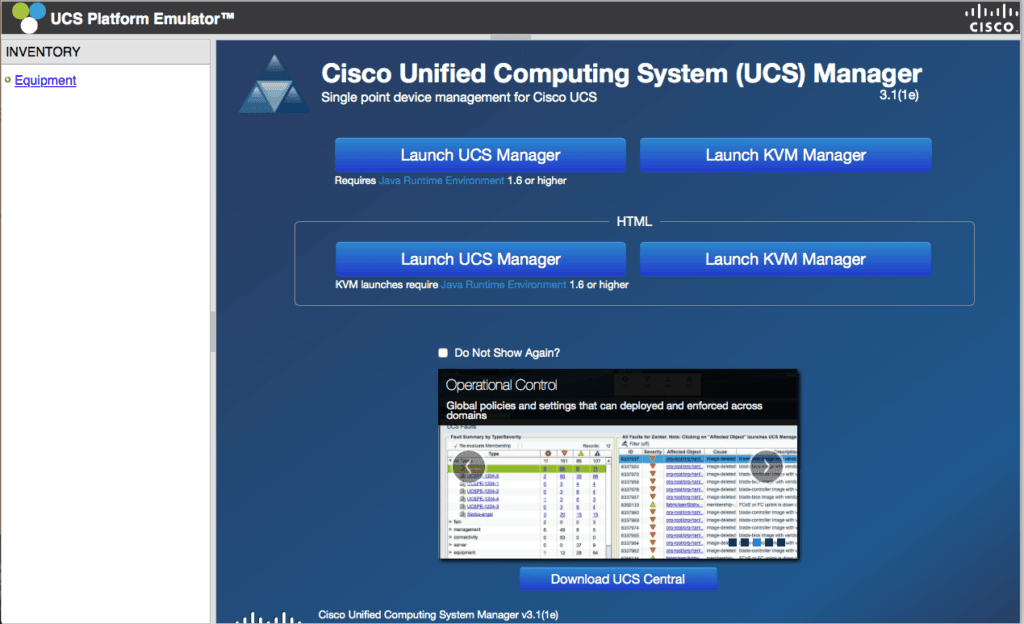
Navigate to the IP address of the VIP in a browser, and you will be greeted with the UCS Emulator interface. There are two main parts of the interface, the Equipment Inventory and UCS Manager. First, we are going to start with the equipment interface.
Managing Equipment for Cisco Platform Emulator
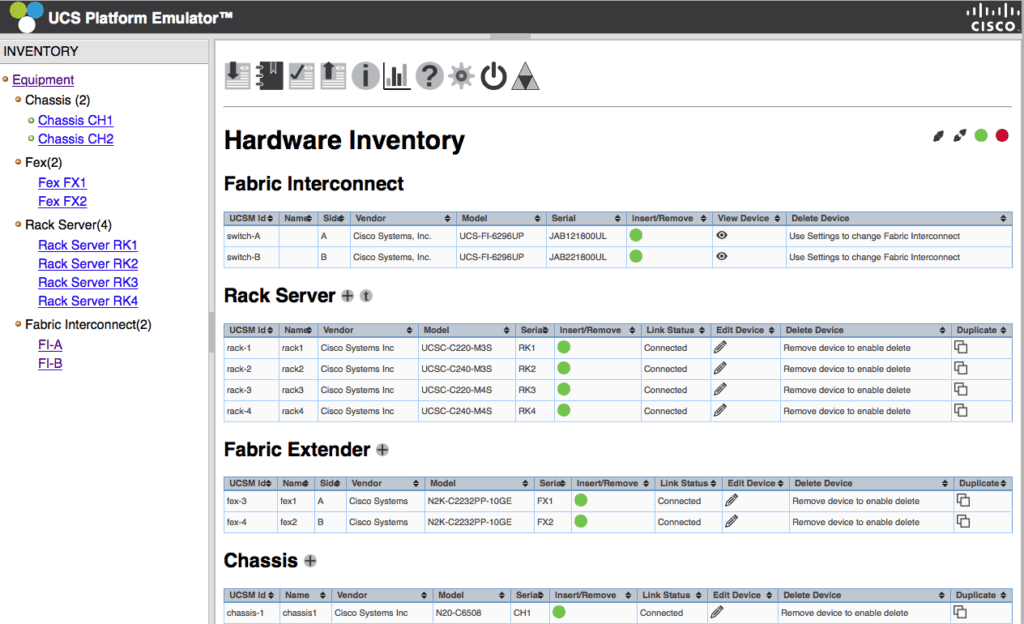
The Cisco UCS Emulator comes with equipment already “installed”. This may work for you, or you may need further customization. There’s a lot of things I don’t want in there, so I’m going to start with removing what I don’t need. Click Equipment in the Inventory pane on the left to get started.
Removing Equipment in UCSPE
Let’s start by getting rid of a rack server. Click the green circle under Insert/Remove. You will see a little box that says “Remove?” With a Green Checkmark and a Red X. You may be tempted to click the Red X, but it is asking you to confirm you are removing the hardware, so click the Green Checkmark.
Now you will see the message that your removal has launched successfully.
This may take a bit of time, but when the device is ready to remove, the green circle will be red, and you will be able to click the Red X under Delete Device. It will not ask you to confirm deletion, it will just delete the device.
Your device will be deleted. Continue to use this process for everything else you would like to delete in the inventory.
Note, that if you delete a blade chassis, it will also delete all the blade servers in it.
Adding Equipment to the Cisco UCS Platform Emulator
Now that I’ve gotten rid of everything I don’t need, I’m going to add some equipment. To add something simply click the + button next to what you would like to add and select the model. I’m going to add a new chassis and call it Chassis1.
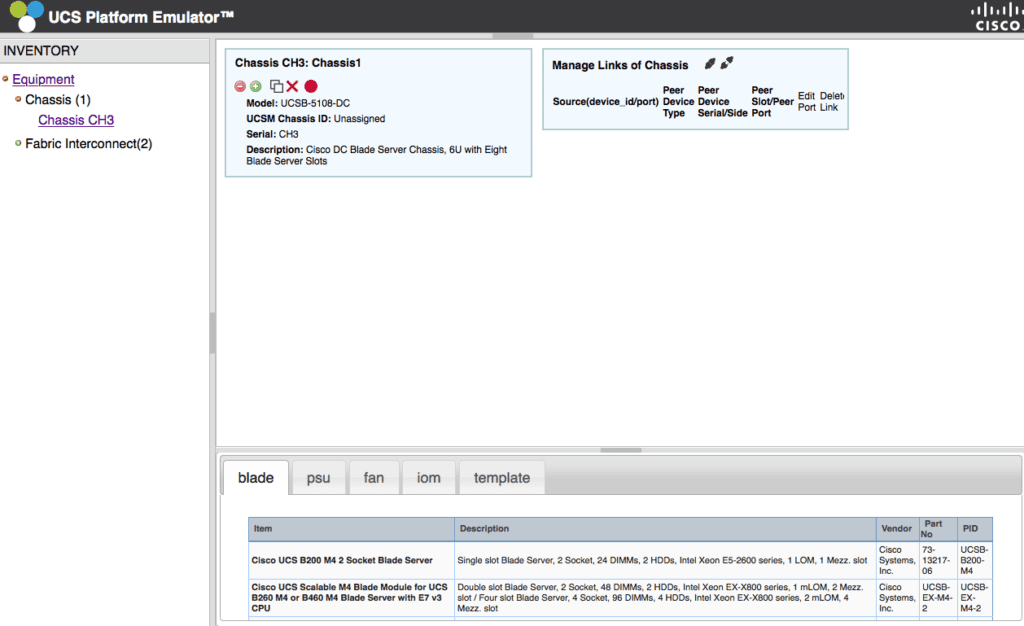
Now I need to edit my chassis. I can click on the Chassis in the equipment link. Yes, it will say Chassis CH3 because I deleted the two that were already in the inventory.
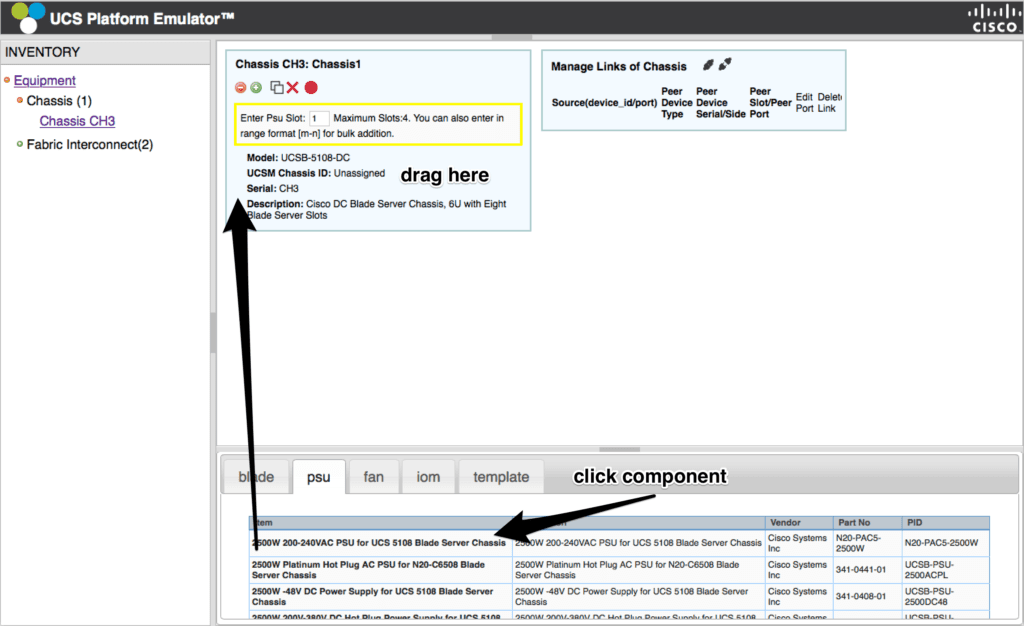
Now we need to add all of the components to the chassis. We need to add blades, power supplies, fans, and IO modules. To add something, click the item in the bottom pane and drag it to the Chassis1 pane. Enter the slot you are putting the hardware in (or a range like 1-4 if you want to fill 4 psu slots with the same device) and repeat these steps for all components. You must have appropriate power supplies and fans in the system, or it will not be happy once you start UCS Manager.
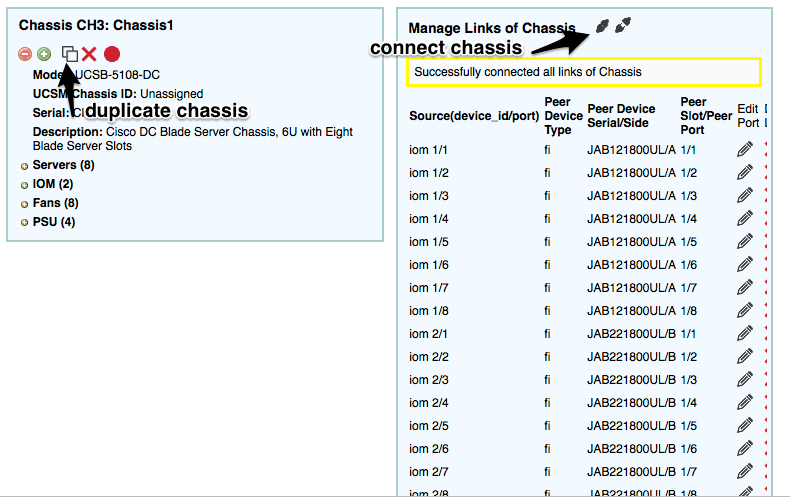
When it comes time for the blades, I like to pick the configurations from the template section, as it has a number of configurations for various servers. After we have everything we want in our chassis, we need to connect it by clicking the Connect button next in the Manage Links of Chassis pane.
You will then see the box with the Green Checkmark and the Red X. Click the Green Checkmark to connect the chassis. After we see everything connected, we can go ahead and duplicate that chassis if we need multiple ones.
Now, after you’ve cloned any additional chassis, view the chassis one by one in the equipment pane and click connect in the Manage Link of Chassis Pane.
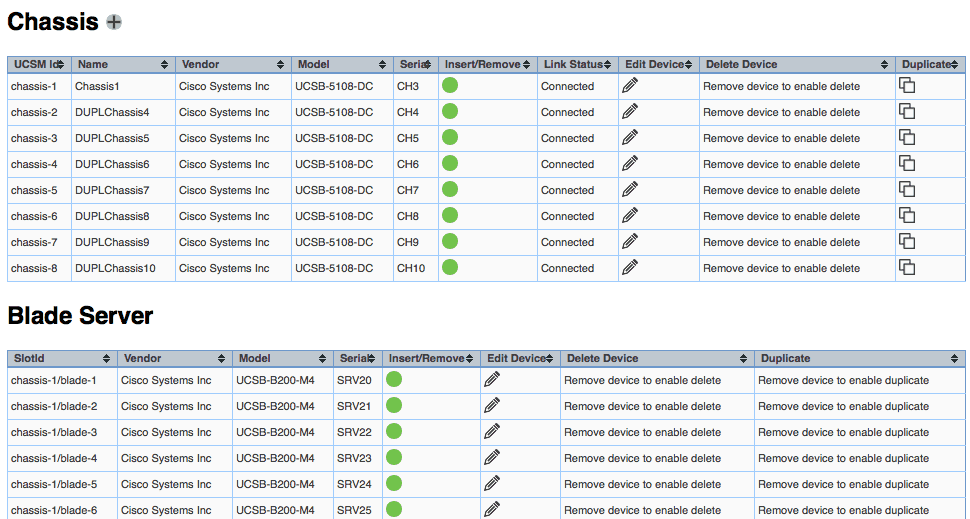
Now that all of our chassis are connected, it is time to insert them into UCS Manager. Click the red circle under Insert/Remove, then click the Green Checkbox to insert the chassis. Repeat this for all chassis.
You’ll notice the blades have also inserted themselves when you inserted their chassis. Now, once you’re greeted with green circles representing all of your hardware, you are ready to launch UCS Manager.
Launching UCS Manager
You can launch UCS Manager by clicking the UCS Manager symbol on the top of the Hardware Inventory pane.
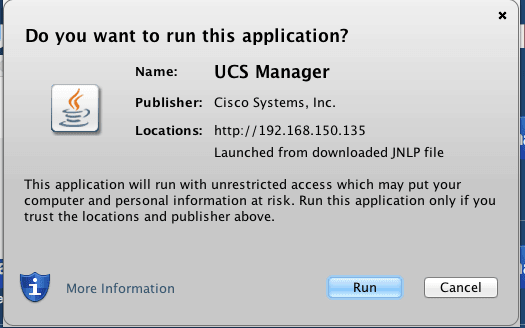
Click Launch UCS Manager. You may be promoted to install JRE if you do not already have it.
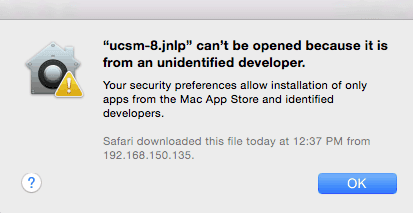
If you’re using a Mac, something to note is that your Mac may not want to run UCS Manager.
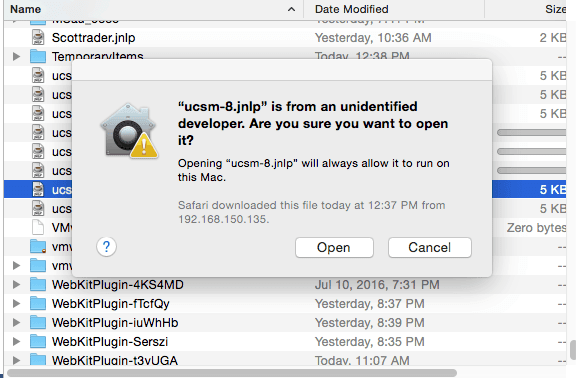
The easiest way to get around this is to locate the file in your finder and open it from there. Right click the file in finder and select open.
It will ask you if you want to open it since it is from an identified developer, click Open, and you will be good to go. It will then ask if you want to run UCS Manager. Of course you do, so click yes!
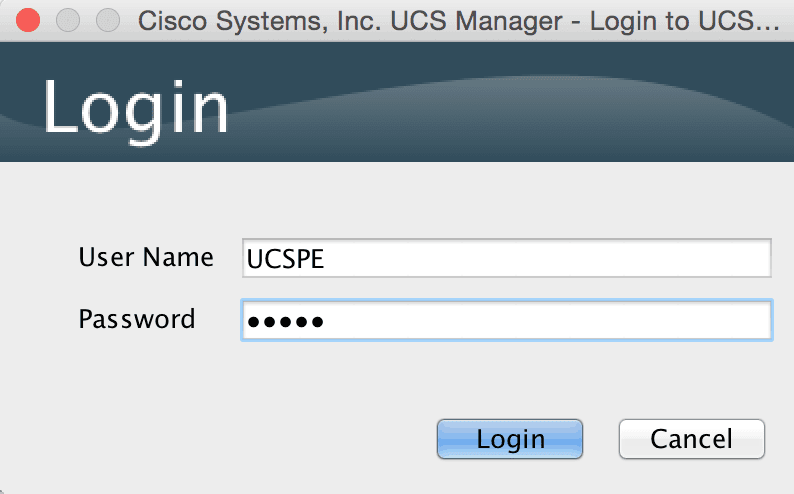
Finally log into UCS Manager with the username/password UCSPE/UCSPE.
Then you’ll be asked about setting up anonymous reporting. I didn’t bother because, well, it’s an emulator.
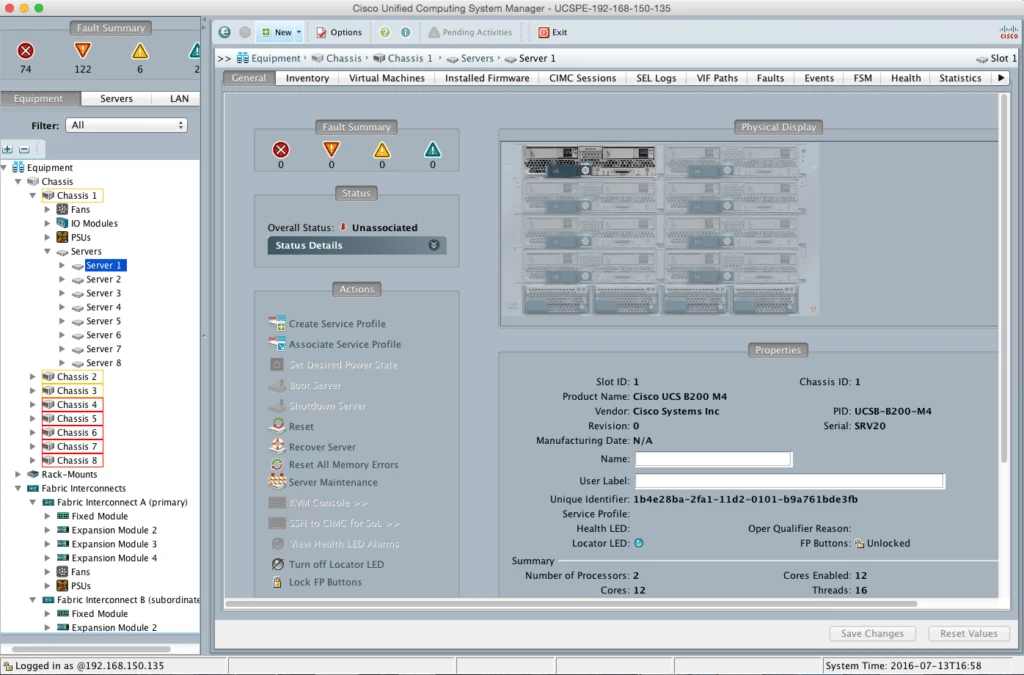
Welcome to UCS Manager! If you click equipment on the navigation pane on the left, you will see your chassis and fabric interconnects.
Expand one of your chassis by clicking the triangle next to it. Then click the triangle next to servers to see the specs of a server. As you can see our chassis is full of B200 M4 servers, just like we configured it.
Saving and Loading Hardware Configurations
After all this work, you may want to save your virtual hardware configuration. To do this, head back to the UCS Platform Emulator page and click equipment. Then click the fourth icon from the left and select Export XML. The XML file will open in a new window. This will be handy if you want to re-load your configuration or transfer it to another simulator. You can import it by clicking the first icon on the right and selecting Import from a Saved XML.
Saving the UCS Manager Configuration
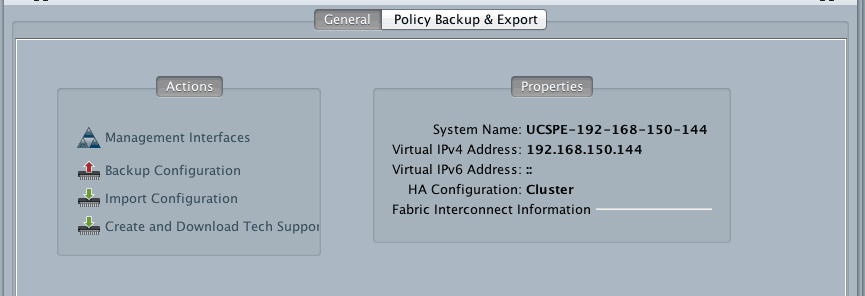
Once you restart the VM, or restart the services, your configuration is gone. I repeat, your configuration is gone. The emulator does not save the UCS Manager state. Luckily, UCS has backup functionality built right in. Navigate to the Admin tab in the left pane, and you will see Backup Configuration under Actions. Click Backup Configuration, and Create Backup Operation.
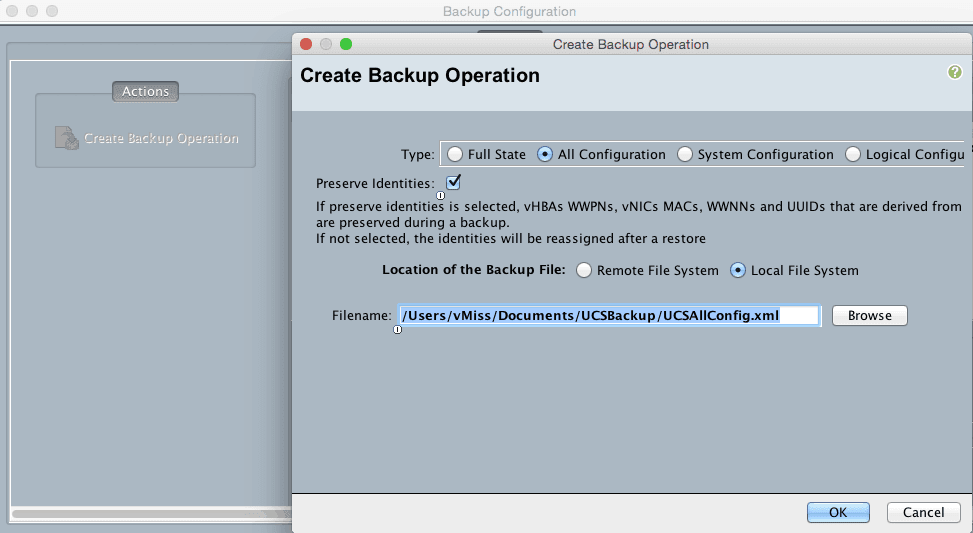
Admin State Enabled means back up right now, so make sure to click the Enabled radio button if you are backing up to a network location. The UCS Emulator Platform does not support Full State backups, so select any of the others. I like to select All Configuration and Preserve Identities.
You can backup to a server, or locally. I just back up locally by selecting Location of Backup File as Local File System. Browse to the location you would like to select, and type a file name at the end ending with XML – and no spaces in the name.
You will get a popup that says your Backup File has successfully downloaded. Save the Port Channels!
Importing (Restoring) UCS Manager Configuration of the Cisco UCS Emulator
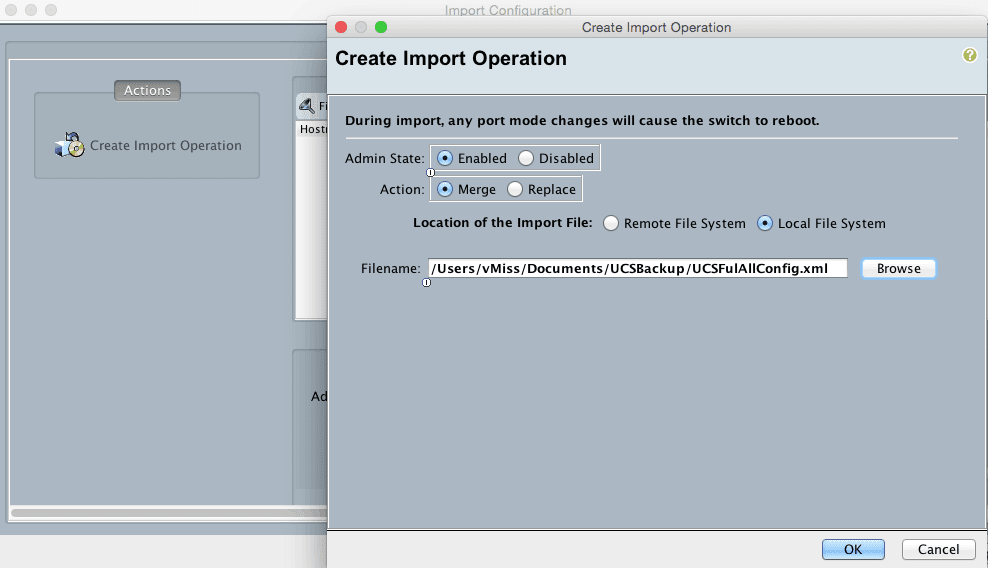
Navigate to the admin tab in the left pane. You will see Import Configuration under Actions. Select Create Import Operation and select your configuration file. As with backing your configuration, Admin State Enabled means do it right now. Then click OK. You will see a message that the configuration has imported successfully and you can pick up where you left off. Your Port Channels are back!
Troubleshooting the Cisco UCS Emulator
This section lists some issues you may run into during use of the UCS Platform Emulator.
Help! I’m clicking but nothing is happening when I’m setting up my hardware configuration in the UCSPE web interface!
Keep in mind this is just a little VM running all of this virtualized hardware. Every once in a while it may simply…not work. It did not seem to be very happy when I rolled through connecting eight chassis fairly quickly, or when I was trying to connect them all.
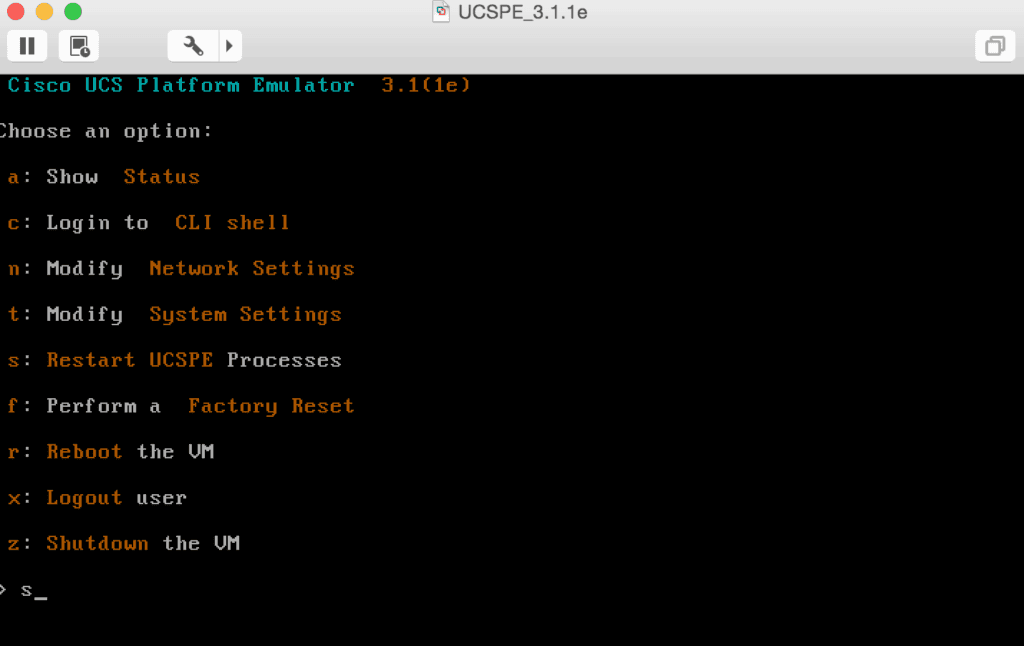
To restart the UCS Emulator processes, go back to the console screen and type s and hit enter. If you’re using DHCP like I am, your IP addresses may have changed so make sure to verify them. Remember, restarting the processes or VM will destroy any configuration you have done with UCS Manager.
Hey, my chassis are all Red and Orange and stuff. What do I do?
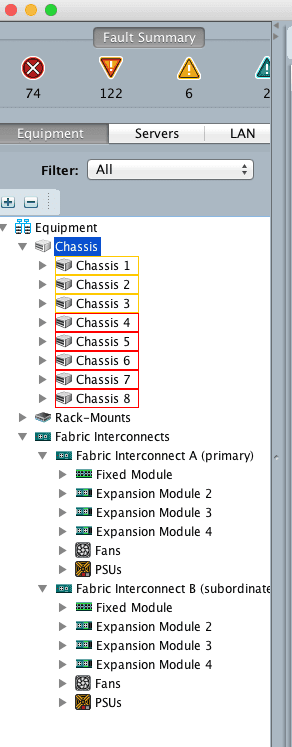
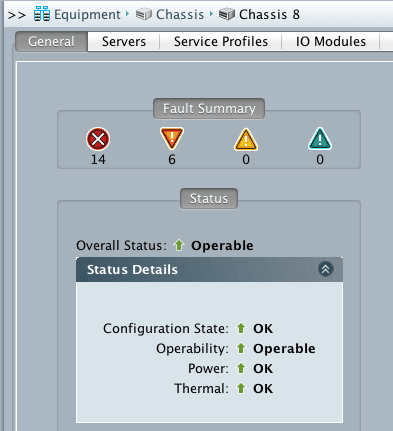
I haven’t figured out exactly what’s up with this yet. When I didn’t add PSUs and Fans it was much much worse. While some of the chassis are loaded with faults, they aren’t that bad from a usability perspective. There’s some thermal and power issues with some of the servers it looks like.
Overall, the chassis says operable so I wouldn’t worry too much. Also, when you configure something not quite right UCS Manager will probably throw a fault at you, so it is a good idea to take a look at them every once in a while.
Um…what’s the username and password for UCS Manager?
UCSPE/UCSPE. ALL CAPS :).
I rebooted the emulator VM and IT’S ALL GONE!
Did you backup the configuration inside UCS Manager? No? Start over, and make sure you do that next time!
More Cisco UCS Platform Emulator Resources
Ready to get rolling with the Cisco UCS Platform Emulator? Check out these other helpful resources:
Setup and Use of the Cisco UCS Platform Emulator (You are here!)
Tips and Tricks for Using the Cisco UCS Platform Emulator
Updating Your UCS Platform Emulator
Changing Fabric Interconnects on the UCS Platform Emulator
Getting Started With Cisco UCS Platform Emulator Version 3.2(3ePE1)
Whether you call it the Cisco UCS Platform Emulator, Cisco UCSPE, UCSPE, or any variant there of, the Cisco UCS Emulator, is a great way to get some hands on experience with Cisco UCS Manager, and test new configurations without impacting your environment. Happy emulating!

Melissa is an Independent Technology Analyst & Content Creator, focused on IT infrastructure and information security. She is a VMware Certified Design Expert (VCDX-236) and has spent her career focused on the full IT infrastructure stack.

